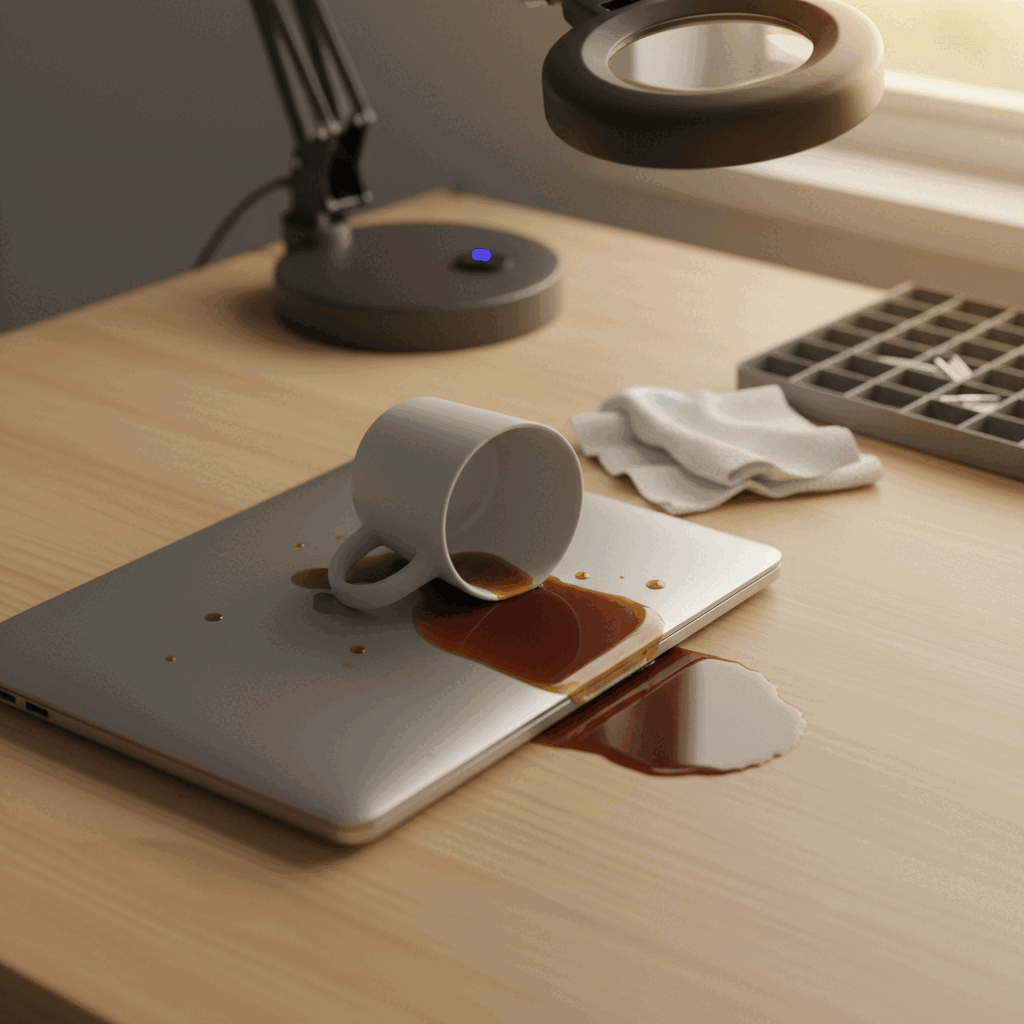
A spilled drink is the most common laptop disaster we deal with, and the difference between a £120 clean-and-test and a £500 board-level rebuild is almost always what happened in the first half-hour. Here’s the field guide.
What to do, in this order
1. Power off, hard. Right now.
Hold the power button for 10 seconds. Don’t shut down through the OS — you don’t have time. Liquid plus electricity is what corrodes pads and burns ICs, so cutting power is the single most useful thing you can do.
2. Unplug the charger
If it was charging, get the cable out. The 19V or USB-C delivery rails are still live until they’re physically disconnected.
3. Flip it upside-down on a towel
Hinge open, screen and keyboard facing the floor, on a soft towel. Gravity is now your friend — it pulls the liquid back out the way it came in instead of letting it pool on the motherboard. Leave it like that.
4. Pop the battery if it’s removable
If you’re on an older ThinkPad, Dell Latitude, or any laptop with a removable battery slide, remove it. On modern unibody MacBooks and ultrabooks, skip this step — you’ll do more harm prying the case apart than the battery does staying put. We’ll handle it on the bench.
5. Don’t try to dry it with rice / a hairdryer / the oven
Rice doesn’t work — it doesn’t reach the inside of the laptop. A hairdryer pushes liquid further into the chassis and warps trackpads. The oven kills the screen. The only effective dry is a stripdown plus an ultrasonic clean, which we do daily.
6. Don’t power it on to “check if it still works”
This is the single most expensive mistake. A laptop that’s been spilled on can boot once, look fine, and corrode a power-delivery IC three weeks later. Or short across pads and burn the chip the instant you press power. Wait until it’s been opened, cleaned, and inspected.
What we do when it arrives
Every liquid-damage job follows the same protocol on the bench:
- Strip and inspect. The full machine comes apart. We look at every connector, ribbon cable, and surface for residue. Photos of everything go in the file.
- Ultrasonic clean. The motherboard, keyboard, and any contaminated assemblies go into the ultrasonic bath. Twenty minutes at the right frequency lifts dried residue out of every pad and via, including under chips where you can’t reach by hand.
- Test fault-by-fault. Power on the bench supply through a current-limiting setup. Watch what draws current and what doesn’t. Identify the actual damaged components rather than guessing.
- Repair or replace. Most liquid jobs we see come down to one or two corroded ICs — charging IC, USB controller, sometimes a SMC. Those get replaced under a microscope and the board gets re-tested.
- Long burn-in. A liquid-damaged board has to run for several days before we trust it. Anything that fails in that window gets re-worked before we ship.
What it actually costs
If you got it to us within 6 hours, didn’t power it on, and stored it upside-down, success rate is around 80% on a flat fee that depends on the model. If you powered it on once or twice, dropped to 50% with a higher labour bill. If it’s been weeks of intermittent use since the spill, we’ll quote based on what we find — sometimes recovery is still possible, sometimes the cheapest path is to recover your data and write off the chassis.
Either way, the diagnostic and quote are free. Drop in to 56 Tavistock Place any time, day or night, or book a free DPD collection if you’re outside London.


